Showing posts with label cookies. Show all posts

Monday, May 14, 2012

Chocolate Oatmeal Moon Pies

Have I mentioned my love for marshmallow creme before?  Love love love.  So when I saw this recipe for oatmeal moon pies in Bon Appetit I was all over it.  I told my husband I was making them and he said "I figured as much when I saw that recipe".  I am nothing if not predictable in my love of sweets.

I changed the recipe up a bit, omitting and adding some of the cookie ingredients.  That said on it's own this oatmeal cookie recipe is awesome.  Never mind drizzling them with chocolate (I skipped the glaze) and sandwiching a healthy dollop of marshmallow creme between them.  

I originally made these months ago for my son's preschool's bake sale.  After making them I realized they weren't that portable since marshmallow creme is pretty molten.  But I wrapped them up in wax paper and tied them up with ribbon so they worked out pretty well.  They're really best assembled and immediately eaten though.  Enjoy!


Chocolate Oatmeal Moon Pies
adapted from Bon Appetit

1 1/4 cups unbleached all-purpose flour
3/4 teaspoon baking powder
1/2 teaspoon baking soda
1/2 teaspoon kosher salt
2 1/4 cups old-fashioned oats
1 cup pecans, chopped
1/2 cup raisins
1 cup good quality semisweet or bittersweet chocolate chips
3/4 cup (1 1/2 sticks) unsalted butter, room temperature
1 1/2 cups (packed) dark brown sugar
1 large egg
1 teaspoon vanilla extract
2 7-ounce jars marshmallow creme
about 6 ounces good quality dark chocolate for melting and drizzling


Arrange racks in upper and lower thirds of oven; preheat to 350°. Line 3 baking sheets with parchment paper. Whisk flour, baking powder, baking soda, and salt in a medium bowl. Combine oats, raisins, pecans, and chocolate chips in a large bowl.


Using an electric mixer, beat butter and sugar in another large bowl, occasionally scraping down sides of bowl, until smooth, about 2 minutes. Add egg and vanilla and beat to blend. Scrape down sides of bowl. With machine running at low speed, gradually add flour mixture; beat just to blend. Stir in oat mixture with a wooden spoon just to blend.


Using a 1-oz. ice cream scoop or scooping out 2 level tablespoonfuls of dough, measure dough into 36 portions. Divide among baking sheets. Using your hands, gently press down on each dough ball until 1/2" thick.


Bake cookies for 12 minutes. Rotate sheets front to back and top to bottom; continue baking until cookies are golden brown and edges have begun to set but centers are still soft (cookies will appear underdone and shiny in centers), 7–8 minutes longer. Do not overbake.  I actually did one batch at a time so without rotating racks 12 minutes was enough.  Let cookies cool on baking sheets. DO AHEAD: Cookies can be made 2 days ahead. Store airtight at room temperature.

Once cookies are room temp melt the chocolate and drizzle over each cookie.  Once dry (this can take several hours), spread 1 Tbsp. marshmallow creme on bottom of 18 cookies. Sandwich with remaining cookies.

Linked to:
Crazy Sweet Tuesday 

Tuesday, May 8, 2012

Hummingbird Cookies

I just wanted to share these hummingbird cookies I made and sent my Mom for her birthday recently.  I wish I had done a tutorial, but I was in a rush so I just have a picture of the final product.  I also made soccer ball cookies for my Dad, but apparently hexagons are quite hard to get right so they weren't as cute as I had envisioned (thus, no photo documentation).

For the hummingbirds I mainly used the flow method of decorating, and did everything but the beak at the same time.  Most of their poor little beaks broke off in transit, and in hindsight they were probably not a good choice for shipping, but my Mom loves hummingbirds so I wanted to make something special.  Thanks for looking and happy birthday to my wonderful Mom and Dad!!

Tuesday, February 14, 2012

cream wafers

I have seen lace cookies on various blogs I follow, and I've always thought they look just gorgeous.  I really wanted to try to make some but was so intimidated.  If you feel the same as I did, fear not!  These are seriously ridiculously easy to make, they just take a steady hand (I found resting my elbows on the counter helps) and some patience.


I used my favorite sugar cookie recipe, royal icing,  and the lace cookie tutorial from Sweet Sugar Belle. 


I also gave brush embroidery flowers a try, and I think they turned out alright! Check out this tutorial on Sweet Sugar Belle's website for another great tutorial.

Happy Valentine's Day!!

Linked to:
Mrs Fox's Sweet Party 
Sweet Treats Thursday

Wednesday, January 4, 2012

Madeleines

Last year for Christmas my husband bought me a Madeleine pan.  I couldn't wait to make these dainty little lemon scented treats.  Unfortunately, my first attempt was a total bust.  Annoyed, I shoved the pan to the back of my baking cupboard.  I admit to being totally intimidated by these cookies, I mean, they seemed so easy and they had been a complete fail.

But when browsing my Baking cookbook by Dorie Greenspan, I read through her recipe and decided to give them another try.  I love Dorie.  Her recipes are full of info and super detailed so you really can't go wrong.  And I didn't this time.  My Madeleines were perfect, even with the requisite 'bump'.  These are best eaten the day they are made, so a perfect treat to impress your guests any time of year.


Classic Madeleines
from Dorie Greenspan


3/4 c. all purpose flour
1/2 tsp. double-acting baking powder
2 large eggs, at room temperature
1/2 c. sugar
Grated zest of 1 lemon
2 tsp. pure vanilla extract
5 tbsp. unsalted butter, melted and cooled

Sift together the flour and baking powder. In a mixer with a whisk attachment, beat the eggs and sugar together at medium-high speed until they thicken and lighten in color, about 2-4 minutes.
Beat in the lemon zest and vanilla. With a large rubber spatula, gently fold in the dry ingredients, followed by the melted butter. Cover the batter with plastic wrap, pressing it against the surface to create an airtight seal. Chill for at least 3 hours.

Preheat the oven to 400 degrees. If your Madeleine pan is not nonstick, generously butter it and dust with flour. Set the pan on a baking sheet for easy transportability. Spoon the batter into the molds, filling them almost to the top. Don’t worry about smoothing the batter. It will even out as it bakes.
In the center rack of the oven, bake large madeleines for 11-13 minutes, and small ones for 8-10 minutes, or until they are puffed and golden and spring back when touched.
Remove the cookies by either rapping the pan against the counter or gently running a butter knife around the edges of the cookies. Cool on a cooling rack.

Wednesday, December 14, 2011

Peppermint White Chocolate Meringues

Ah, these are awesome.  They might just be my new favorite Christmas cookie.  Even my husband, who doesn't like meringues, thought these were amazing.  They're a perfect combination of a chewy meringue, white chocolate, and sweet peppermint candy.  We ate the first batch so fast I can't wait to make another. 

I actually don't particularly care for white chocolate these days, but something about the combination of peppermint and white chocolate is delectable.  I dipped these lovely little sweets in a fringe of dark chocolate as well, and let me tell you, they are heaven.  Love love love.

The only thing I did a little differently is I ran the candy canes through my Bullet to make it more of a powder than coarsely crushed.  My teeth don't do well with super crunchy so this was a good solution to make them easier to eat.


White Christmas Dream Drops
from Sunset 
 

2 large egg whites, at room temperature
1/8 teaspoon cream of tartar
1/2 teaspoon vanilla extract
1/8 teaspoon salt
3/4 cup sugar
1 cup white chocolate chips
1/3 cup plus 1 1/2 tbsp. coarsely crushed peppermint candies (mine were powdery, I ran them through my Bullet)


Preheat oven to 250°. Beat egg whites and cream of tartar in a deep bowl with a mixer, using whisk attachment if you have one, just until soft peaks form. Add vanilla and salt. With motor running and mixer on high speed, pour in 1 tbsp. sugar and beat 10 to 15 seconds, then repeat until all sugar has been added. Scrape inside of bowl and beat another 15 seconds. At this point, meringue should form straight peaks when beaters are lifted. Fold in chocolate chips and 1/3 cup candies with a flexible spatula.

Line 2 baking sheets with parchment paper, using a bit of meringue at corners as glue. Using a soup spoon, drop meringue in rounded 1-tbsp. portions slightly apart onto sheets, scraping off with another spoon. Sprinkle with remaining 1 1/2 tbsp. candies.

Bake until meringues feel dry and set when touched but are still pale, 30 to 35 minutes, switching pan positions halfway through. Turn off oven, open door, and let cookies stand about 10 minutes. Let cool on pans.


If you're feeling like an extra hit of chocolate, dip these in good quality melted chocolate and let dry on the parchment.

Make ahead: Up to 2 days, stored airtight.

Christmas Sugar Cookies

I have an insanely long list of Christmas cookies that I plan to make this holiday season.  I doubt I'll get around to even half of them, but I knew I wanted to make my favorite sugar cookies.  I love decorating cookies, and there is so much inspiration on the Internet.  One of my favorite websites is Glorious Treats.  Her cookies are simply gorgeous.  I have honestly been waiting all year to make her pastel snowflake cookies, and once December arrived these are the first cookies I made.

Decorating sugar cookies isn't hard, but holy smokes is it time consuming.  Set aside several hours for decorating, at least.  If you want to do piping on top of the fill color, you ideally need to wait about six to eight hours for the base to dry.  I use royal icing to do the frosting, using meringue powder.  I sort of go by Wilton's recipe but I find I need to at least double the amount of water, maybe it depends on the powder I'm using.  Consistency is key, so if you've never decorated sugar cookies before check out one of the many excellent online tutorials.


 Tyler and Laura's Cream Cheese Sugar Cookies
from Cafe Blue Ridge

1 C sugar
1C butter, softened
3 oz. cream cheese, softened
1/2 tsp. salt
1/2 tsp. almond extract
1/2 tsp. vanilla
1 egg yolk
2 C plain flour

In large bowl, use mixer to cream butter with sugar, then cream cheese. Add next 4 ingredients, blending well, then add flour and mix until incorporated. Refrigerate 1 to 2 hours, this makes the dough easy to roll. Preheat oven to 375 degrees F.

On lightly floured surface, roll out dough, one-third at a time, to desired thickness, and cut into shapes with lightly floured cookie cutters. If you really want the cookies to hold their shape, place cookies on a parchment lined cookie sheet and refrigerate for about 20 minutes, then put directly into pre-heated oven.  Depending on the size of your cookies, this recipe makes 4 dozen or so.

Place 1 inch apart on ungreased cookie sheet.  Bake 10 minutes or so, until they begin to brown lightly at the edges. Cool a few minutes in the pan, then transfer to rack.

Monday, August 15, 2011

Graham Crackers

Every once in a while I see a post for homemade graham crackers, and I think to myself "why bother?".  I was reminded again this weekend, that if it's made from scratch it's usually a million times better than out of a box, and these little babies are no exception.

They're more like a honey shortbread cookie rather than a cracker, and mmm boy are they good.  I made them for a s'mores recipe and my kids and husband were all over them.  They're quick to make, crispy, buttery, with a warm taste of honey.  I don't think I'll ever buy graham crackers again.


Homemade Graham Crackers
from Sunset Magazine

3/4 cup butter, at room temperature
1/3 cup packed light brown sugar
1/4 cup granulated sugar
1 tablespoon honey
1 1/4 cups all-purpose flour
1/3 cup whole-wheat flour
1/2 teaspoon baking soda
1/2 teaspoon cinnamon
1/4 teaspoon salt


Beat butter, sugars, and honey in a large bowl with a mixer until smooth. In another bowl, mix dry ingredients. Add to butter mixture and beat until blended.

Divide dough in half and roll each half between 2 sheets of parchment paper into an even 10- by 12-in. rectangle. Slide each set onto a baking sheet and freeze until firm, about 10 minutes. Preheat oven to 300°.

Pull off top parchment. Cut dough on pans into 2 1/2- by 4-in. rectangles. Bake until deep golden brown, 13 to 18 minutes; swap pans halfway through. Cut crackers again on lines.

 Let crackers cool on pans 2 to 3 minutes. Separate pieces and transfer to cooling racks.
Make ahead: Up to 1 week, airtight; or freeze up to 2 months.

Sunday, July 31, 2011

Chewy Frosted Sugar Cookies

Pin It

I have never had a Lofthouse cookie before, so I don't claim these are anything like them, but every time I see them in the grocery store I am so tempted.  The Supper Club that we're part of was getting together this weekend and I thought it was the perfect opportunity to make my own frosted sugar cookies.  I was making a tiramisu cake for the adults and what kid would turn down a giant frosted, sprinkled, cookie?

These are pretty sweet so I think next time I might cut the sugar, but the lemon extract added a nice subtle flavor.  The frosting is my go-to sugary sweet American buttercream, which whips up nice and fluffy thanks to some added whipping cream.  I think Lofthouse cookies are a bit more cakier, but the kids loved these and I didn't mind sneaking a couple as well!


Golden Sugar Cookies
from Recipe Hall of Fame Dessert Cookbook

2 1/2 cups flour
1 teaspoon baking soda
1 teaspoon cream of tartar
1/4 teaspoon salt
1 cup butter, softened
1/2 teaspoon vanilla
1/2 teaspoon lemon flavoring
2 cups sugar
3 egg yolks

Sift first four ingredients together and set aside.  Cream butter and extracts; gradually add sugar, creaming until fluffy after each addition.  Add egg yolks, one at a time.  Add dry ingredients in fourths to creamed mixture; beat just until blended after each addition.  Form dough into 1 inch balls and place 2 inches apart on cookie sheet.  If you want extra large cookies stack two dough balls together and place about 3 inches apart on cookie sheets.  Bake at 350 degrees F for 10 minutes.


For the Frosting:

½ cup (1 stick) unsalted butter, softened
2 ½ cups confectioner’s sugar
2 tablespoons heavy whipping cream
a few drops gel food coloring (optional)


Combine butter and confectioner’s sugar in a mixer fitted with the paddle attachment.  Beat on low speed for about 1 minute, or until the butter and sugar come together (it will start off quite crumbly).  Add the whipping cream and beat on high speed until the frosting becomes light and fluffy, approximately 2 minutes.

Linked to:
Sweet Indulgences Sunday
Melt in Your Mouth Monday 
These Chicks Cooked Link Party 
Sweet Treats Thursday 
Sweet Tooth Friday 
Sweets for a Saturday

Monday, July 11, 2011

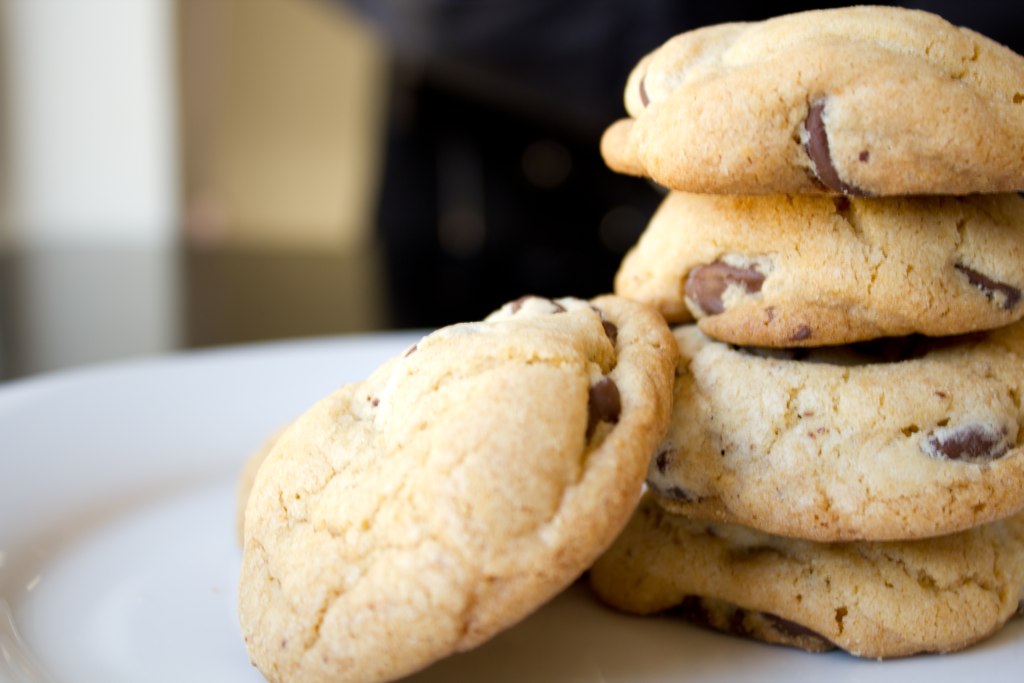
Ultra Chewy Chocolate Chip Cookies

Why do I keep trying chocolate chip cookie recipes.  This one from America's Test Kitchen is by far my favorite though.  It's made with brown butter which give it a deep rich flavor, and they're super chewy.  Mmmm, I want to make more just thinking about them.

I've made these a couple of times now, once I added raisins and toasted pecans along with the chocoalte chips which were and amazing combination.  I think next time I might also throw in some toffee pieces as well.  The recipe is very specific, it calls for whisking part of the batter several times for 30 seconds with a three minute rest period in between whiskings.  I don't know what the reasoning behind it is, but when cookies turn out this delicious why mess with the technique?


Perfect Chocolate Chip Cookie
adapted slightly from America's Test Kitchen


1 3/4 cups unbleached all-purpose flour (8 3/4 ounces)
1/2 teaspoon baking soda
14 tablespoons unsalted butter (1 3/4 sticks)
1/2 cup granulated sugar (3 1/2 ounces)
3/4 cup packed dark brown sugar (5 1/4 ounces)
1 teaspoon salt
2 teaspoons vanilla extract
1 large egg
1 large egg yolk
1 1/2 cups chocolate chips (or substitute 1/2 cup raisins for chocolate chips)
3/4 cup chopped pecans


Adjust oven rack to middle position and heat oven to 375 degrees. Line 2 large (18- by 12- inch) baking sheets with parchment paper. Whisk flour and baking soda together in medium bowl; set aside.

Heat 10 tablespoons butter in 10 inch skillet over medium-high heat until melted, about 2 minutes. Continue cooking, swirling pan constantly until butter is dark golden brown and has nutty aroma, 1 to 3 minutes. Remove skillet from heat and, using heatproof spatula, transfer browned butter to large heatproof bowl. Stir remaining 4 tablespoons butter into hot butter until completely melted.

 Add both sugars, salt, and vanilla to bowl with butter and whisk until fully incorporated. Add egg and yolk and whisk until mixture is smooth with no sugar lumps remaining, about 30 seconds. Let mixture stand 3 minutes, then whisk for 30 seconds. Repeat process of resting and whisking 2 more times until mixture is thick, smooth and shiny. Using rubber spatula or wooden spoon, stir in flour mixture until just combined, about 1 minute. Stir in chocolate chips and nuts (if using), giving dough final stir to ensure no flour pockets remain.

Using a small ice cream scoop, place cookie dough onto prepared baking sheets approximately 1 1/2 inches apart. Bake cookies 1 tray at a time until cookies are golden brown and still puffy, and edges have begun to set but centers are still soft, 10 to 14 minutes, rotating baking sheet halfway through baking. Transfer baking seet to wire rack; cool cookies completely before serving.

Linked to:
Melt in Your Mouth Monday
These Chicks Cooked Link Party  
Sweet Treats Thursday 
Sweets for a Saturday 
Sweet Indulgences Sunday

Tuesday, May 24, 2011

Car Cookie Pops

I wanted to do a special cupcake topper for my son's 3rd birthday a few months ago, and thought I would try my hand at some car cookie pops.  I was pretty nervous making these since I'm not exactly an artist, but I think they turned out pretty darn cute.  The kids loved them, and we also gave them away as party favors.

I used my favorite sugar cookie recipe, and a recipe for royal icing using meringue powder.  I have never worked with royal icing before, but it make decorating the cookies fairly easy.  I won't lie, these took FOREVER and there were plenty of cookies that didn't make the cut.  The main thing to remember is that consistency with the icing is key.  If it's too runny your designs will all run together, too thick and it won't even out and dry with a nice finish.

I followed this tutorial from Sweetapolita for making the cookie pops, and then used a variety of tips and tricks on decorating with royal icing from Sweetopia.  I love checking out both these blogs, their cookies and cakes are simply gorgeous! 


Photo by Jamie Lacey Photography


Photo by Jamie Lacey Photography


Car Cookie Pops

1 recipe sugar cookies (below)
1 recipe royal icing (below).  You made need more depending what type of designs you do
lollipop sticks (any craft store should have them, don't get the shortest ones, get medium or longer)
Gel Color (I use Wilton)
toothpicks

Tyler and Laura's Cream Cheese Sugar Cookies
from Cafe Blue Ridge

1 C sugar
1C butter, softened
3 oz. cream cheese, softened
1/2 tsp. salt
1/2 tsp. almond extract
1/2 tsp. vanilla
1 egg yolk, reserving egg white to decorate
2 C plain flour

Preheat oven to 375 degrees F. In large bowl, use mixer to cream butter with sugar, then cream cheese. Add next 4 ingredients, blending well, then add flour and mix until incorporated. Refrigerate 1 to 2 hours, this makes the dough easy to roll.

Roll the dough out between two pieces of parchment paper, put on a cookie sheet or cutting board, and refrigerate for about 30 minutes.   Then using your cookie cutters, cut out the dough and insert your lollipop stick approximately half way into the cookie.  If it pokes through just patch it up with some scrap cookie dough, no one will notice the back and the front will be covered with icing.  Place on a parchment lined cookie sheet

I then put the cookie pops back in the fridge for another 30 minutes before baking.  This helps the cookie keep it's shape when baking.

Bake 10 minutes or so, until they begin to brown lightly at the edges. Cool a few minutes in the pan, then transfer to rack.

Once cookie pops are completely cool you can get on with the icing.

Royal Icing
from Joy of Baking

4 cups (440 grams) confectioners' (powdered or icing) sugar
3 tablespoons (30 grams) meringue powder
1/2 teaspoon extract (vanilla, lemon, almond)
1/2 - 3/4 cup (120 - 180 ml) warm water
Food Coloring (I use Gel Pastes)

 In the bowl of your electric mixer (or with a hand mixer), beat the confectioners' sugar and meringue powder until combined.  Add the water and beat on medium to high speed until very glossy and stiff peaks form (5 to 7 minutes). If necessary, to get the right consistency, add more powdered sugar or water. To cover or 'flood' the entire surface of the cookie with icing, the proper consistency is when you lift the beater, the ribbon of icing that falls back into the bowl remains on the surface of the icing for a few seconds before disappearing.
The icing needs to be used immediately or transferred to an airtight container as royal icing hardens when exposed to air. Cover with plastic wrap when not in use.
Makes about 3 cups
Decorating the Cookie Pops
I started by doing an outline around the edge of the cookie, and then flooding the center and filling gently with a toothpick.  This is where you'll know if the consistency of yoru icing is right.  You can always add more water or a bit more confectioner's sugar.  Once you've done the main color, let them dry completely, this usually takes several  hours.

I did the windows and wheels at the same time, but be very careful not to use too much icing.  A lot of my cookies ran and didn't turn out so great.  If you catch it in time you can try and use a toothpick to clean off any icing.


Linked to:
Sweet Tooth Friday
Sweets for a Saturday 
Sweet Indulgences Sunday 
Melt in Your Mouth Monday

Saturday, April 30, 2011

Vanilla Bean Dream Cream Pie

I had never baked with vanilla beans until about a month ago, and believe me they are so worth the price.  Vanilla beans have such an intense vanilla scent and flavor, and I love the gorgeous flecks they add to baked goods.

So when Dessert Wars announced their April theme was vanilla I was all in.  There was a catch though, you needed to use vanilla in three different ways in one dessert.  I had quite a few ideas,  most of which my husband told me were lame, until I came up with this one.

A vanilla bean wafer crust, a creamy vanilla bean and rum filling, topped with vanilla bean pralines.  Have I got your attention now?  If you love vanilla this is the dessert for you.  Mmmmm.  Cream pies are so awesome, and this one is loaded with rich vanilla flavor. 


Vanilla Wafers
adapted from Frugal Antics of a Harried Homemaker


1 stick butter, softened
1/2 cup sugar
1 large egg
1 vanilla bean, split length-wise and scraped
1 1/4 cup all purpose flour
1 tsp baking powder
Using a stand mixer fitted with the paddle attachment, cream the butter and sugar until light and fluffy . Add the egg and vanilla and beat until combined.  Whisk together the flour and powder, beat into butter mixture until just combined.  
Roll into a log, approximately 12 inches long, the radius should be about 2-3 inches.  Wrap in plastic wrap and freeze for at least 4 hours, preferably overnight.  
Preheat oven to 350 degrees.  Take dough out of the freezer about 1/2 hour before slicing.  Cut into slices about 1/2 inch thick.  Place on baking sheet lined with parchment paper, about 1 inch apart.  Bake for 10 minutes or until golden brown.  Let cool on baking sheet for about 5 minutes, than remove to wire rack to cool completely.

Vanilla Wafer Crust
1 1/4 cup crushed vanilla wafers
1/4 cup melted butter
2 tablespoons sugar
Preheat oven to 350 degrees F.  Mix all the ingredients together and press into a 9-inch pie pan.  Bake for 8-10 minutes.  Cool completely before filling.


Vanilla Bean Pralines
adapted from Allrecipes

1 1/2 cups toasted pecans
1 1/2 cups white sugar
3/8 cup butter
3/4 cup brown sugar
1/2 cup milk
1/2 vanilla bean, split length-wise and scraped

Line a baking sheet with aluminum foil.
In large saucepan over medium heat, combine pecans, sugar, butter, brown sugar, milk and vanilla. Heat to between 234 and 240 degrees F (112 to 116 degrees C), or until a small amount of syrup dropped into cold water forms a soft ball that flattens when removed from the water and placed on a flat surface.
Drop by spoonfuls onto prepared baking sheet. Let cool completely.  Chop coarsely to use as pie topping.


Rum Vanilla Cream Pie Filling
Adapted from Martha Stewart 

1 cup granulated sugar
1/4 cup cornstarch
1/4 teaspoon salt
2 1/2 cups whole milk
1 1/2 vanilla beans, split and scraped, pods reserved
4 large egg yolks
1/4 cup plus 1 tablespoon (2 1/2 ounces) golden rum
2 ounces (4 tablespoons) unsalted butter, softened
1/2 cup heavy cream
Combine granulated sugar, cornstarch, and salt in a medium saucepan. Whisk in milk and vanilla seeds, and cook over medium-high heat, stirring constantly, until bubbling and thick, about 7 minutes (about 2 minutes after it comes to a boil).
Whisk yolks in a medium bowl until combined. Pour in milk mixture in a slow, steady stream, whisking until completely incorporated. Return the mixture to saucepan, and cook over medium heat, stirring constantly, until it returns to a boil, 1 to 2 minutes.
Remove from heat, and stir in 1/4 cup rum. Add butter, 1 tablespoon at a time, whisking until butter melts before adding next piece. Let cool in saucepan on a wire rack, whisking occasionally, for about 10 minutes.
Pour custard into a large bowl . Press plastic wrap directly on surface of custard. Refrigerate until custard filling is chilled and firm, at least 4 hours (or overnight).

Meanwhile, place cream and vanilla pods in a bowl. Cover, and refrigerate for at least 4 hours (or overnight).  Remove the vanilla pods and beat the cream into stiff peaks.  Stir the custard, then carefully fold the whipped cream into the custard.  Spoon into the crust and topped with chopped pralines.  Chill until firm, at least one hour.

Friday, April 22, 2011

Meringues

I love meringues.  They're sugary, light, and melt in  your mouth.  My son calls them clouds and was all excited when I made these, as was I!

Meringues are pretty easy to make, they just take a reaaallly long time.  Baking time varies, but all recipes require at least two hours in a low heat oven with the door cracked open.

I made these for my husband's insane birthday cake (recipe coming soon), and the recipe came out of Dessert University by Roland Mesnier.  Great book, but Roland doesn't spell a lot of stuff out for you, I guess he expects you to know certain baking basics, if not maybe you should head back to Dessert Elementary, if such a book exists.  Apparently I would need this book since half my meringues were crap.

Obviously if you're baking something with the oven door cracked open what is at the front of the oven is going to bake at a different rate than what is at the back, so you should rotate your pans every once in a while.  Yeah, didn't do that.  I baked them about 5 hours, and the ones at the front that I was testing were still quite soft.  I was super annoyed at the wasted time since I thought they were all garbage (I left these to the day of assembling the insane cake) but when I took the pans out the ones at the back were perfect.  So a lot of waste, but a lesson learned.  Thanks Roland,  you could have just told me in the first place.


Swiss Meringues
by Roland Mesnier

8 large egg whites
2 cups sugar

Preheat oven to 200 degrees F.  Position racks in the top and bottom thirds of the oven.  Line two baking sheets with parchment paper.
Combine the egg whites and the sugar in the stainless steel bowl of an electric mixer.  Pour enough water into the bottom of a large saucepan so that when the bowl is placed over it, the bottom of the bowl will come into contact with the water.  Heat, whisking constantly, until the egg whites are about 125 degrees F, or feel like warm soup to the touch.

Remove the bowl from the heat and beat the whites with an electric mixer on high until the meringue is cool and stiff.  Pipe the meringue into desired shapes on the baking sheets.  I used my large star tip that I usually use for piping frosting onto cupcakes.

Place baking sheets in the oven and leave the oven door cracked open about 1 inch (I stuck a wooden spoon the door).  Bake until completely dry, 2 to 3 hours, but this totally depends on how thick your meringues are.  Mine weren't that big and they took about 4 to 5 hours.  Also, you should periodically rotate the pans.  Since I didn't do this I don't really know how much, but I would say at least once after 2 hours.

Remove meringues from the oven and let them cool completely on the baking sheets.

Linked to:
Sweet Tooth Friday
Sweets for a Saturday 

Linked to:
Melt in Your Mouth Monday

Wednesday, April 6, 2011

Ellis' Pretty and Pink 1st Birthday Party

I recently posted about my darling baby girl Ellis' 1st birthday and her first taste of cupcakes.  That weekend we had a bigger birthday party for her complete with a cake smash, and I was lucky to have my dear friend Jamie from Jamie Lacey Photography there to capture the whole event.

Everything was in pink.  Pink drinks, pink cupcakes, pink party favors, pink napkins, pink balloons, pink everything.  For all I know Ellis is going to grow up to hate pink, but for now Mommy gets to choose the party themes.

Ellis doesn't really have any friends her own age but her older brother Liam's friends just love her.  The kids all talk about her and ask if she'll be at playdates.  So they all came to help us celebrate our gorgeous, hilarious, sweet little Ellis' first birthday.

This was my first attempt at making a banner, and I'm super happy with the way it turned out!

Photo by Jamie Lacey Photography


The cupcakes were pink of course, I also made some cupcake toppers

Photo by Jamie Lacey Photography


You can never have too many pink desserts so I made strawberry coconut Lamingtons and sugar cookies

Photo by Jamie Lacey Photography


Photo by Jamie Lacey Photography


Pink M&Ms and coneflower kits were favors for the kids

Photo by Jamie Lacey Photography


Ellis' cake was almost too pretty to let her smash.  Almost

Photo by Jamie Lacey Photography


And the birthday girl had her beatuiful pink cake all to herself

Photo by Jamie Lacey Photography

Friday, March 11, 2011

Deluxe Double Chocolate Cookies

Let me start by saying you must be a true chocolate lover to make these cookies.  These are the most intense rich chocolate cookies I have ever eaten.  They are pure chocolaty heaven.  If you do decide to make these cookies, you need to use good quality chocolate.  I used Guittard for the bittersweet and Sharfenberger for the cocoa powder.  Yes it may be more difficult to find and more expensive, but I assure you it's worth it.

This recipe comes out of my Tartine cookbook.  Tartine is a glorious bakery in the Mission district of San Francisco, if you ever come to the Bay Area I highly suggest making at least one visit to Tartine, the line up is totally worth it.  I have made a few things out of their cookbook, all are completely delicious and this cookie recipe is no exception.

I did one batch just dropping the dough by tablespoon-full onto the cookie sheet but found the resulting cookie kind of visually unappealing.  The rest I rolled into 1.5 inch balls (by all means make them bigger, I probably will next time).  Et voila!


Deluxe Double Chocolate Cookies

from Tartine
 
8 ounces bittersweet chocolate, coarsely chopped
1 cup plus 1 tablespoon all-purpose flour
½ cup plus 2 tablespoons  cocoa powder
2 teaspoons baking powder
½ cup unsalted butter at room temperature
1 cup plus 2 tablespoons sugar
2 large eggs
¼ teaspoon salt
1 teaspoon vanilla extract
1/3 cup whole milk


Preheat the oven to 350 degrees F. Line baking sheets with parchment paper.
Melt the chocolate in the top of a double boiler or in a stainless steel bowl set over simmering water. Ensure that the water does not touch the bottom of the bowl. When the chocolate is melted, remove from the heat.
Stir together the flour, cocoa powder, and baking powder. Set aside. Using a standard mixer with the paddle attachment, beat the butter on medium-high speed until creamy. Slowly add the sugar and mix until the mixture is completely smooth and soft. Add the eggs, one at a time, mixing well after each addition. Scrape the sides of the bowl as needed. Beat in the salt and the vanilla, and then add the melted chocolate and beat on low speed until incorporated. Add the milk and beat until combined. Finally, add the flour mixture and beat on low speed until incorporated.
Drop the dough by heaping tablespoonfuls onto the prepared baking sheets, spacing them about 1 inch apart. Bake the cookies until they are just barely firm on top when lightly touched but are still very soft underneath, about 7 minutes. They will get firmer as they cool. Transfer the cookies to a wire rack and let cool. They will keep in an airtight container at room temperature for several days.

Linked to
Sweets for a Saturday
Sweet Tooth Friday 
Melt in Your Mouth Monday

Monday, March 7, 2011

Jacques Torres Chocolate Chip Cookies

Just wanted to say thanks to my dear sister for her lovely post on French Apple Cake while I was away in Maui for the week with my family.  We had a wonderful time, it was our first visit to Maui and certainly won't be our last.  What a gorgeous place.

Back to baking:

Why do I keep making chocolate chip cookies when I have two perfect go-to recipes?  One is super chewy, the other buttery, crispy on the edges and chewy on the inside.  But when I found this recipe for famed master pastry chef Jacques Torres' chocolate chip cookies I just couldn't resist.  I was totally intrigued by the use of cake flour and bread flour.  I used The Cilantropist's version of the cookie since she did an amazing job of perfectly halving this originally enormous recipes. 

If you're thinking of making this recipe, be aware that you must, and I mean MUST, leave it in the fridge or freezer for at least 24 hours.  I actually do this with all drop cookies now.  It allows the gluten to relax giving you a chewier cookie.  I divided the recipe in two, did the 24 hour refrigeration with half and froze then second half for a week.  The frozen cookie dough was so much chewier then the first.  I highly recommend freezing the dough for at least 24 hours rather than refrigerating it.

I used a new type of chocolate chip from my favourite chocolate company, Guittard.  These are their Super Cookie Chocolate Chips, and holy moly they are perfection!  Seriously, they have done something to make these meltier for longer, which in addition to being some of the best chocolate ever makes these chocolate chips straight from heaven.  They are hard to find, but you can buy them online.


Jacques Torres Chocolate Chip Cookies
from Jacques Torres,  recipe used from The Cilantropist 

1 cup cake flour, OR add 2 tbsp cornstarch to the bottom of a 1-cup measuring cup, then fill to the top with all-purpose flour
3/4 cup bread flour
1/2 teaspoon baking soda
3/4 teaspoon baking powder
3/4 teaspoon coarse salt
1 1/4 stick unsalted butter, room temperature
3/4 cup brown sugar
1/2 cup granulated sugar
1 large egg
1 teaspoon vanilla extract 
10 ounces semi-sweet chocolate chips

Mix first five ingredients in a medium bowl and set aside.  In a mixer, cream butter, brown sugar, granulated sugar and vanilla together until creamy, about 5 minutes.  Add egg and mix, then add dry ingredients and mix on low speed just until everything is well incorporated.  Add chocolate chips and mix by hand to distribute.  Form the dough into a compact ball in the bowl, and press plastic wrap directly against the dough.  Refrigerate or freeze dough for at least 24 hours, up to 48 hours. 

To bake, preheat oven to 350 degrees.  Line a baking sheet with parchment paper.  Scoop out dough and form into balls that are approximately 1 3/4-2 inches in diameter.  Place on prepared baking sheet about 3 inches apart.  Bake until golden brown; about 15-17 minutes, depending on how soft you want the center of your cookies.  Cool baking sheet on a wire rack, then transfer cookies to the rack to cool completely.  This recipe will make about 18-20 cookies that are 3-3 1/2 inch in diameter.     

Linked to:

Sunday, February 27, 2011

Orange Vanilla Bean Panna Cotta with Limoncello Gelee and Chocolate Florentines

The February 2011 Daring Bakers’ challenge was hosted by Mallory from A Sofa in the Kitchen. She chose to challenge everyone to make Panna Cotta from a Giada De Laurentiis recipe and Nestle Florentine Cookies.

This was my first challenge with the Daring Bakers, I am so excited to participate!  I have only ever had panna cotta from Trader Joe's and I loved it, so I couldn't wait to give this a try.  Panna cotta is ridiculously easy to make.  It's like making jello but with cream.  I actually did two recipes though, the first was David Lebovitz's Buttermilk Panna Cotta.  It was a bit watery and not what I had expected so I thought I would try again. 

I wanted to make a gelee to go with the panna cotta, and I found a great recipe for Limoncello gelee and thought an orange vanilla panna cotta would go nicely.  The panna cotta was easy peasy as was the gelee.  However.  Do not, I repeat, do not, try and pour the gelee onto the panna cotta while it is still piping hot.  A more experienced baker (or someone with a little common sense) would not do this, but I did and completely ruined one of the desserts since the panna cotta literally collapsed under the gelee.  Oops?  I then waited until the gelee was almost room temp and even then poured it in over a spoon.  All was well.

This was delicious.  Super creamy with so much vanilla flavour.  I have never baked with vanilla beans before but they are so much more intense then extract.  The gelee was also delightful, great lemon flavour with plenty of booziness.  I would totally make this again, maybe I'll even successfully unmold it from a ramekin next time.


Onto the Florentines.  These are a pain in the arse to make.  Well, the recipe I went with anyways, which was Martha's chocolate Florentines.  No doubt they look lovely when done, but you have to time it just right and be quick about it to get the cookie off the pan and onto the rolling pin to shape it.  Too early and you ruin it's circular shape (if it had that to begin with, mine quite often turned into odd flying saucer like shapes), too late and it cracks.


I liked these cookies, but not enough for the amount of time involved.  What can I say, I'm lazy and if I put this much time into something it should be spectacular.  That said, the lovely dessert I came up with using the Florentines which worked was delightful.  Behold: chocolate Florentines with coffee liqueur whipped cream drizzled in salted caramel sauce.  Yum!


I also served the (many) broken pieces of Florentine on vanilla ice cream also topped with salted caramel sauce.  This might be my favourite sundae topping ever.


Orange Panna Cotta
from FoodNetwork.com

1 tablespoon powdered gelatin
3 tablespoons water
4 cups heavy cream, or a combination of cream with milk or buttermilk
3/4 cup sugar
6 wide strips fresh orange peel (orange part only-no white pith)
1/2 vanilla bean, split lengthwise


In a small bowl, sprinkle the gelatin over the water and let soak 10 minutes (do not stir).
Meanwhile, heat the cream, sugar, orange peel, and vanilla in a medium saucepan over medium heat, stirring occasionally, to dissolve the sugar. As soon as it simmers, turn off the heat and add the gelatin mixture, stirring to dissolve the gelatin. (If the gelatin doesn’t completely dissolve in 3 minutes, return to the heat and warm gently until dissolved.)
Strain the mixture into a pitcher to remove the vanilla bean and orange rind. Pour the mixture into 6 to 8 ramekins or dessert cups, or into 1 larger dish. Chill, uncovered, at least 3 hours.
To unmold, dip the cups in hot water for 10 seconds, then turn the panna cottas out onto dessert plates (or, simply serve in the cups or by the spoonful).

Limoncello Gelee
from Martha Stewart
1 tablespoon plus 1/4 teaspoon (from two 1/4-ounce envelopes) unflavored gelatin
3 tablespoons cold water
3/4 cup Prosecco (Italian sparkling wine)
3/4 cup limoncello (Italian lemon liqueur)
1/2 cup sparkling water
1/4 cup sugar
1 tablespoon fresh lemon juice

Sprinkle gelatin over cold water in a small bowl. Let stand until softened, about 5 minutes. Heat Prosecco, limoncello, sparkling water, and sugar in a medium saucepan over medium heat, whisking occasionally, until sugar dissolves. Add lemon juice and softened gelatin, and whisk until gelatin dissolves. Pour mixture over panna cotta and refrigerate until set, at least 45 minutes.

Chocolate Florentines
from Martha Stewart's Baking Handbook

Makes 5 dozen (in a perfect world)

1 3/4 cups (about 5 ounces) sliced almonds
3 tablespoons Dutch-process cocoa powder
2 tablespoons milk
3/4 cup sugar
2 tablespoons light corn syrup
7 tablespoons unsalted butter, room temp
1/4 teaspoon salt

Preheat the oven to 350 degrees F.  Line two baking sheets with nonstick baking mats or parchment paper, set aside.  Spread almonds in a single layer on a rimmed baking sheet; toast in oven until lightly golden and fragrant, about 10 min.  Transfer to a clean work surface.  While the nuts are still warm, roll a rolling pin back and forth over nuts to finely crush them.  Let cool completely, then place in a bowl.  Add cocoa, and whisk to combine; set aside.

In a small saucepan, combine milk, sugar, corn syrup, butter, and salt.  Bring to a boil, stirring occasionally with a wooden spoon, and cook until mixture registers 220 degrees F on a candy thermometer.  Add reserved salmond0cooa mixture, and stir to combine.  Transfer mixture to a medium bowl to cool slightly.

Drop batter by rounded teaspoons, about 3 inches apart, onto prepared baking sheets.  Bake, rotating sheets halfway through, until cookies are fragrant and small, tight bubbles emerge from the center, 15 to 20 min.  Have a rolling pin ready.  As soon as the cookies come out of the oven, use an offset spatula to lift cookies, one at a time, and drape them over the rolling pin.  Let stand until set.  Repeat with the remaining batter. 


Monday, February 21, 2011

Chocolate Wafer Sandwich Cookies with Vanilla and Chocolate Filling

I made these tasty little sandwich cookies with the February Dessert Wars challenge in mind.  The theme was dark chocolate and hearts, and I thought these cookies would work nicely.  The wafers are quite crisp, which I normally don't care for, but with the soft sweet cream filling the combination is perfect.  I did hearts for the chocolate cream filling and circles for the vanilla cream.

If you want perfectly round and heart shaped (or whatever shape you're using) wafers, you need to follow Martha's very anal instructions of chill, roll, chill, cut, chill, bake.  This ensures the dough will for the most part keep it's shape during the baking.  Both fillings were delicious, I was a little dubious of the vanilla since it uses vegetable shortening, which for some reason skeeves me out, but it was excellent, but I did prefer it chilled in the fridge so it didn't all squish out of the cookie after taking a bite.  The chocolate cream filling is simply heavenly.


Chocolate Wafer Sandwich Cookies
from Martha Stewart’s Baking Handbook

Makes about 2 dozen sandwich cookies

1¼ cups all-purpose flour, plus more for dusting
¼ cup plus 2 tablespoons Dutch-process cocoa powder
½ teaspoon baking powder
½ teaspoon baking soda
¼ teaspoon salt
1 stick (½ cup) unsalted butter, room temperature
2/3 cup packed light-brown sugar
1/3 cup granulated sugar
1 large egg
1 teaspoon pure vanilla extract

Line two large baking sheets with parchment paper; set aside. In a large bowl, whisk together flour, cocoa, baking powder, baking soda, and salt; set aside. In the bowl of an electric mixer fitted with the paddle attachment, beat the butter and both sugars on medium sped until light and fluffy, 2 to 3 minutes. Add the egg and vanilla; beat to combine. With mixer on low speed, add flour mixture, and beat to combine, scraping down the sides of the bowl as needed.
Turn out the dough onto a piece of plastic wrap, and divide in half. With floured hands, shape each piece into a flattened rectangle, wrap with plastic wrap, and refrigerate until firm, about 30 minutes.
Place one rectangle of dough on a lightly floured work surface. Roll out dough to a scant 1/8-inch thickness, stopping every so often to release the dough by running an offset spatula underneath. You should end up with a rectangle that’s about 14 by 11 inches. Transfer dough to a prepared baking sheet, and freeze until very firm, about 30 minutes. Repeat with remaining dough.
Preheat the oven to 350 degrees. Place one rectangle of dough on a clean work surface. Working quickly, cut out rounds using a 2-inch cookie cutter. (If the dough begins to soften too much, return to the freezer for a few minutes.) Using a wide metal spatula, transfer rounds to a parchment-lined baking sheets, about 1½ inches apart. Gather together remaining scraps, reroll, and cut out more rounds. Freeze until firm, about 15 minutes. Repeat with the remaining rectangle of dough.
Bake, rotating sheets halfway through, until the centers of the cookies feel firm when lightly pressed, 12 to 14 minutes. Transfer to a wire rack to cool completely.
Using an offset spatula, spread 1 tablespoon desired filling onto the flat sides of half the cookies. Sandwich with remaining cookies, keeping the flat sides down. Unfilled cookies can be kept in an airtight container at room temperature for up to 1 week. Once filled, cookies are best eaten the day they are made, but they can be kept in an airtight container in the refrigerator for up to 3 days.

Vanilla Cream Filling
Makes enough to fill 2 dozen sandwich cookies

1 1/3 (5 1/3 ounces) confectioners’ sugar
1/3 cup vegetable shortening
1/3 cup (5 1/3 tablespoons) unsalted butter, room temperature
½ teaspoon pure vanilla extract
pinch of salt

In the bowl of an electric mixer fitted with the paddle attachment, combine all ingredients. Beat on medium-high speed until fluffy and light, 3 to 4 minutes. Use immediately or refrigerate in an airtight container for up to 3 days. Let soften at room temperature before using.

Chocolate Cream Filling
4 1/2 ounces semisweet chocolate, chopped (1 cup)
3/4 ounce unsweetened chocolate, chopped
2/3 cup (half of one 14-ounce can) sweetened condensed milk
1 tablespoon unsalted butter
1 teaspoon pure vanilla extract

Melt chocolates in a heatproof bowl set over (but not touching) simmering water, stirring occasionally.  Add condensed milk, butter, and extract; stir to combine.  Continue to stir over simmering water until all ingredients are smooth, 2 minutes.  Remove from heat, and set aside to cool slightly.

The February Dessert Wars Prize Package Includes:


Sunday, February 13, 2011

Linzer Hearts

I wanted to make a few cute things for my kid's Valentine's parties last week, something a little more for the Moms.  I have had a little set of Linzer cookie cutters for a few years and hadn't used them so I thought I would try them out and use the heart cutout. 

I used the recipe that came with the cookie cutters, and they turned out okay.  They were insanely sweet, I would probably use reduced sugar preserves next time.  The orange extract added a nice flavour, and even though they didn't hold their shape and much as I had hoped they were pretty cute!

If you don't have Linzer cookie cutters and don't plan to make Linzer cookies often, you could just use a heart shaped cutter and make little sandwich cookies.  


Linzer Cookies

1 cup unsalted butter, softened
1 teaspoon orange extract
2 cups all-purpose flour
1 1/2 cups sugar
1 jar raspberry jam
powdered sugar for dusting

Sift the flour and set aside. 
In a mixer fitted with the paddle attachment cream butter, sugar, and orange extract.  Stir one cup of flour in at a time, mixing well. 
Chill the dough for at least two hours.
Preheat oven to 350 degrees F.
Roll out half of the dough to 1/4-inch thick and cut with the plain cutter.  Place on a parchment lined baking sheet and chill for another 30 minutes, then bake for 12 minutes.
Roll out the other half of the dough and use the heart cutout to make the tops of the cookies.  Chill for the 30 minutes, then bake for 12 minutes.

Once the tops and bottoms have cooled completely dust the tops with powdered sugar.  Spread about 2 teaspoons of jam on each cookie bottom and place the tops over bottoms to create a sandwich.
Related Posts Plugin for WordPress, Blogger...